
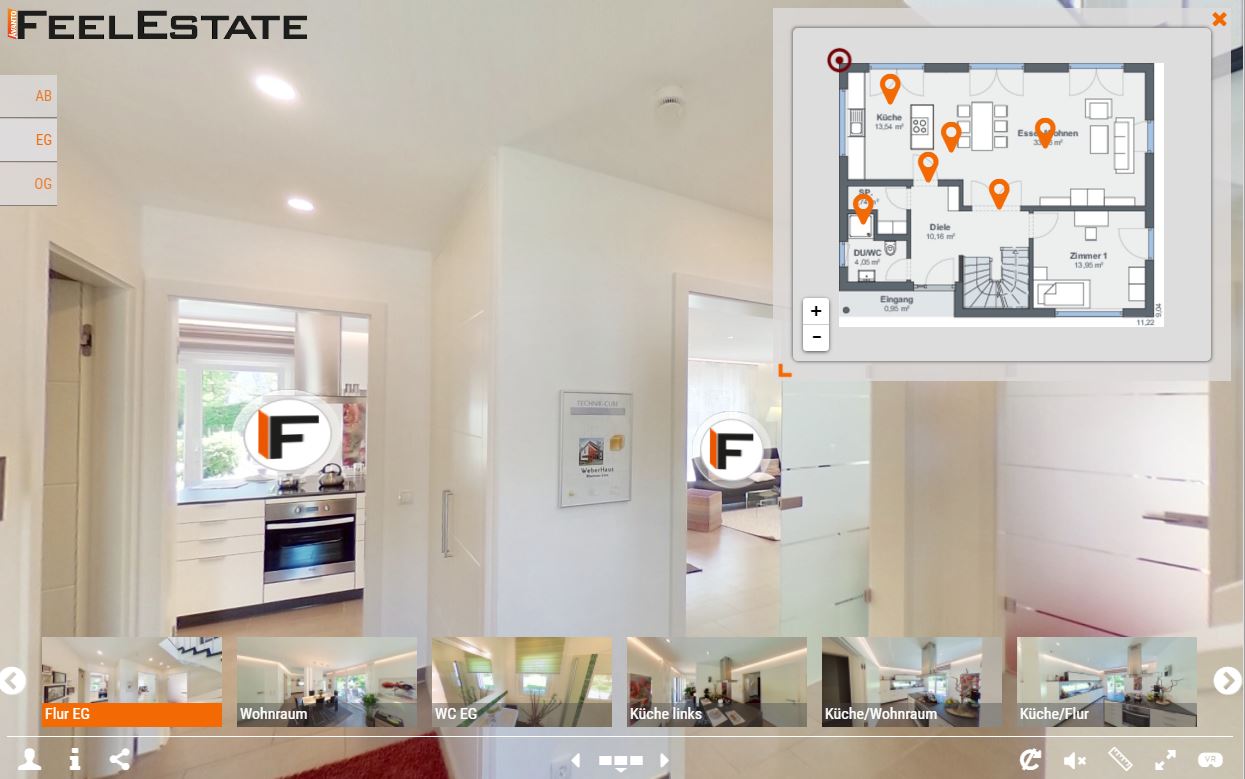
Under Floor Plans in the editing section of your 360-degree-tour, you can add a floor plan to each area of your tour and place markers to position the assigned 360-degree-images in the floor plan.
Note: Floor plans can be uploaded as JPEG or PDF files.
Adding a floor plan to an area
- First, select the area from the list on the left to which you want to add a floor plan.
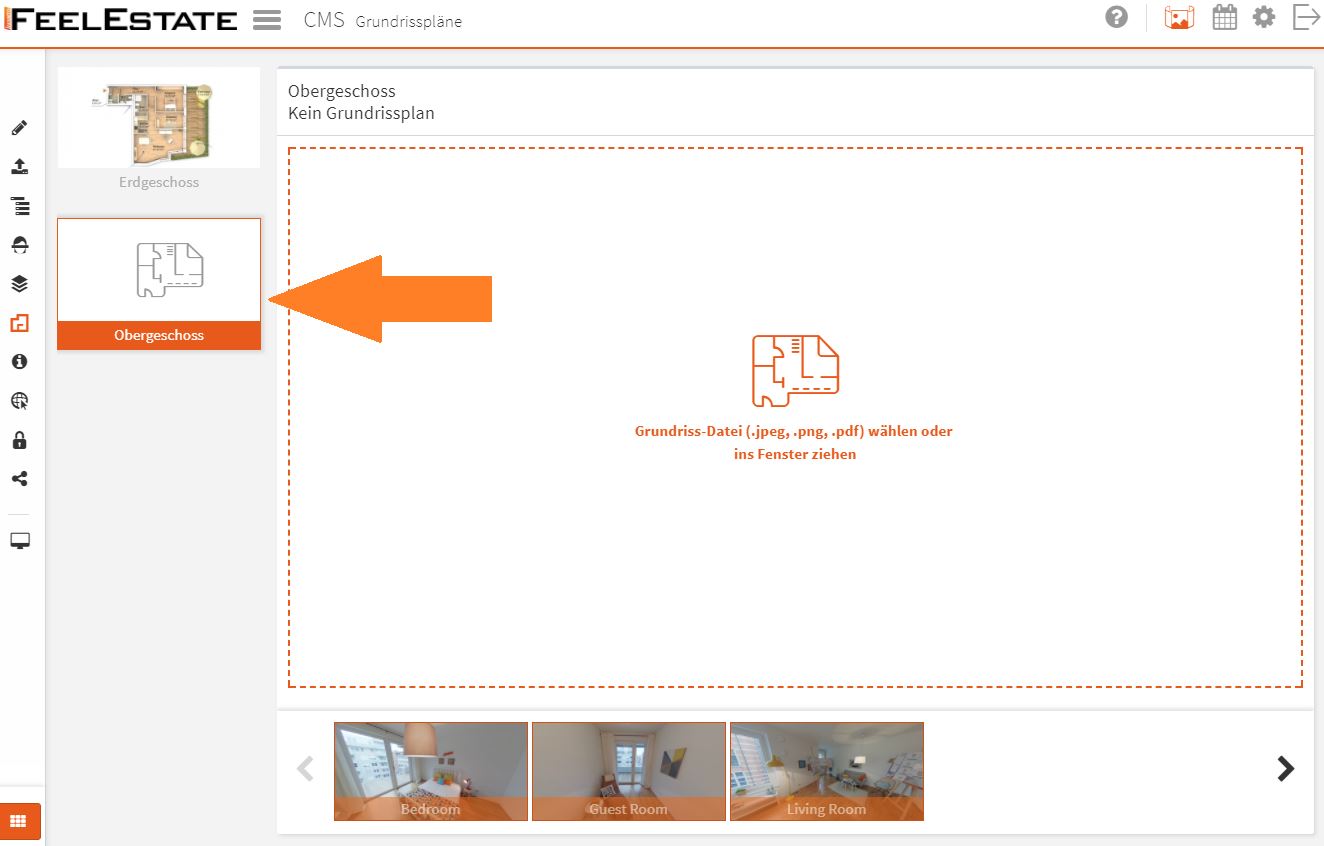
- Now click on the floor plan field on the right side and select a floor plan file ( .JPEG or .PDF) on from your computer. You can also drag the floor plan file from your desktop to the floor plan field to upload it.
- After the floor plan was uploaded, it will be displayed in the selected area.
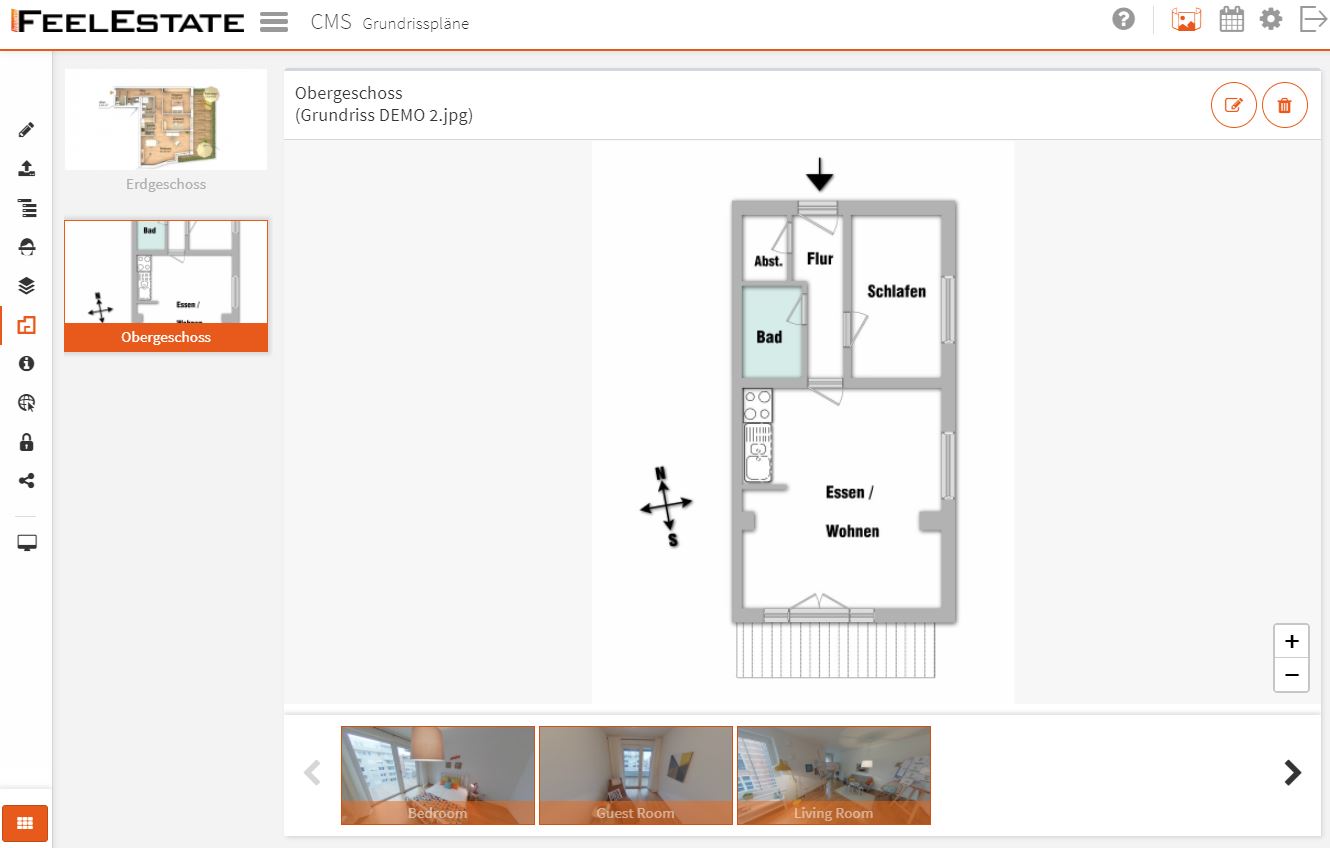
[Change Floor Plan] – Uses this button if you would like replace the current floor plan and upload another file.
[Delete Floor Plan] – Use this button to remove the floor plan from the selected area.
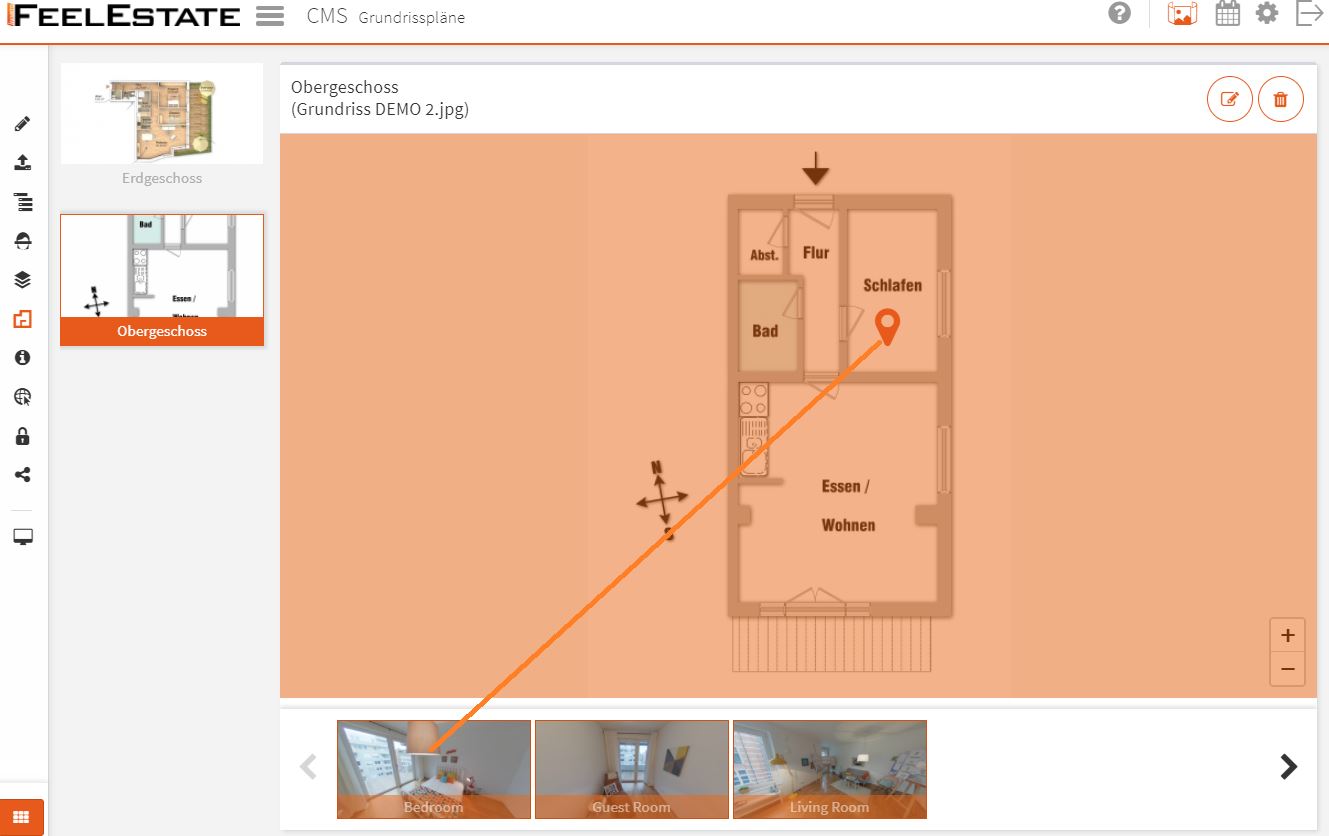
Positioning 360-degree-images in the floor plan
After adding a floor plan to an area, you can now position the 360-degree-images of this area in the floor plan. This way the users in your 360-degree-tour can see their current position in the floor plan and navigate between rooms by clicking on the colored markers in the floor plan.
- In order to position a 360-degree-image in the floor plan, use your mouse to drag it into from the list of “un-positioned” images below the floor plan to the appropriate position in the floor plan where the 360-degree-images was captured.
Removing 360-degree-images from the floor plan
- To remove a 360-degree-images from the floor plan, simply drag the maker out of the floor plan image using your mouse.
- After the image was removed from the floor plan, it will appear in the list of “un-positioned” images below the floor plan again.
Move to the next article Step 8: Creating Info-Content