
Under Connect Images in the editing section of your 360-degree-tour, you can place navigation elements to link 360-degree-images with each other and insert Info-Buttons with information directly in the 360-degree-images of your tour.
Connecting 360-degree-images
Step 1: First select the 360-degree-images in the gallery (left) from where you want to move to another shot.

Step 2: Drag the navigation button to the place where you want to make a realistic movement to the desired target shot.

Step 3: Now select a 360-degree-images as the destination for the navigation button.
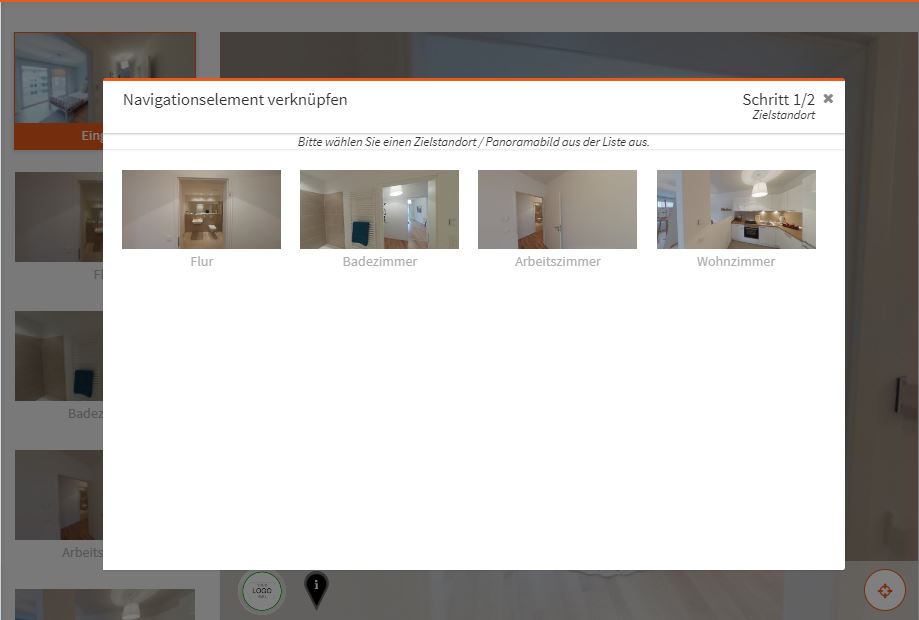
Step 4: Select a viewing direction in the destination image. This is what the user will see first when moving through the navigation button.
Note: You can choose an individual viewing direction for each navigation button to create a realistic “walk-through like” impression.
Step 5: Now that you have successfully placed a navigation button to move forward to another 360-degree-image, select the destination image in the gallery on the left and use the same procedure to make the connection in the other direction. This way, the movement between two 360-degree-images works in both directions.
Setting the default start view for 360-degree-images
The default viewing direction is what users see, whenever they enter a 360-degree-image in your 360-degree-tour through the image gallery or the floor plan. Only navigation buttons in your tour each have an individual viewing direction for the destination image.
To adjust the default viewing direction of a 360-degree-image, simply select the image under Connect Images in the gallery on the left side and move the view in the window on the right side to the desired position using your mouse.
Save the current viewing direction as the default viewing direction by clicking on the Set default start view button (bottom right).
Note: From the start viewing direction of each shot, the preview image is generated, which is displayed in the gallery in the 360-degree-tour. The preview image of the first 360-degree-image of the tour also serves as a thumbnail for the entire 360-degree-tour.
Adding Info-Buttons to a 360-degree-image
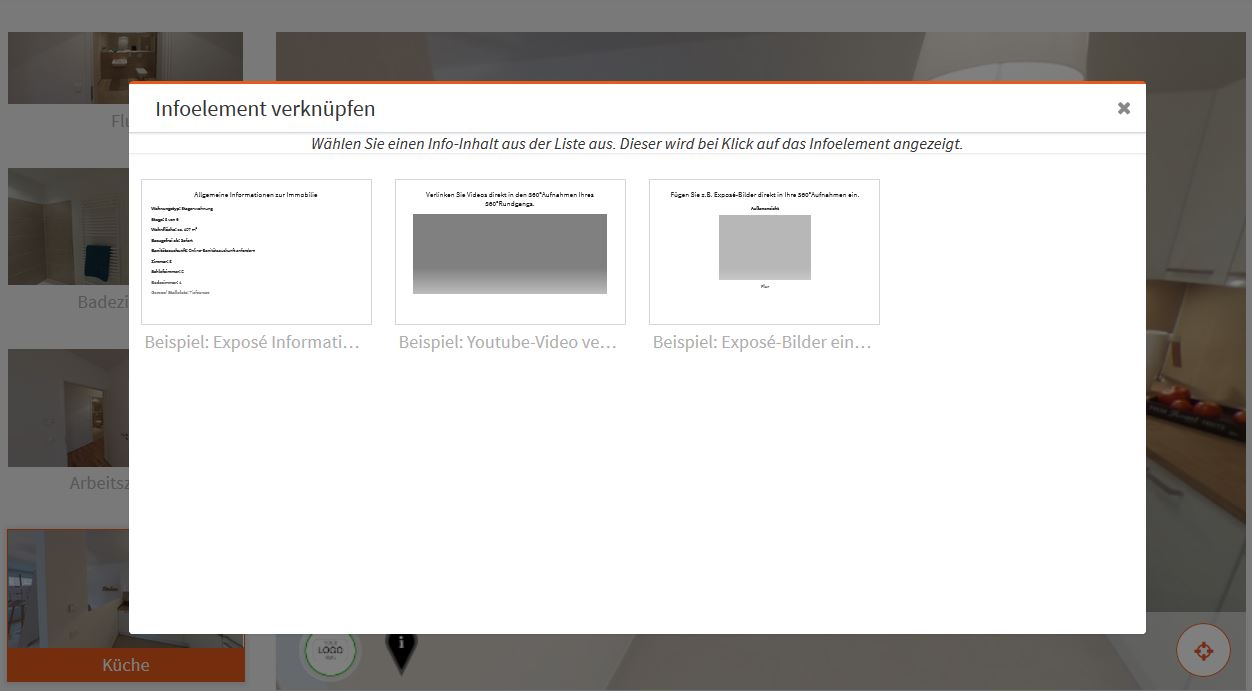
Step 1: Select a 360-degree-image from the gallery on the left side and drag the info point to a place in the image where you want to add information.

Step 2: Now select a info content template from list. This info template can now be viewed via the info point in the 360-degree-image in your tour.
Move to the next article Step 10: Managing the Access Control