
Under Areas in the editing section of your 360-degree-tour, you can divide your tour into areas such as floors (First Floor, Second Floor, Outside Area etc.) to which you can assign 360-degree-images and floor plans.
The areas are displayed in the 360-degree-tour on the left side. The full name of an area shows up when you move your mouse over the colored flag.
NOTE: Areas are only displayed in your 360-degree-tour if more than one area has 360-degree-images assigned to it.

Creating a new Area
To create a new area for your 360-degree-tour click Create Area and enter a name and an abbreviation. You can change the name of an area as well as the abbreviation by clicking on Change Area Name or Abbreviation.
Note: In a new 360-degree-tour there is always one default area to which all 360-degree-images are assigned.
Assigning 360-degree-images to an area
To move a 360-degree-images to another area, simply drag the image from one area to another one with your mouse (drag&drop).
Note: A 360-degree-image can only be assigned to one area. As soon as you move it over, it is automatically removed from the original area.

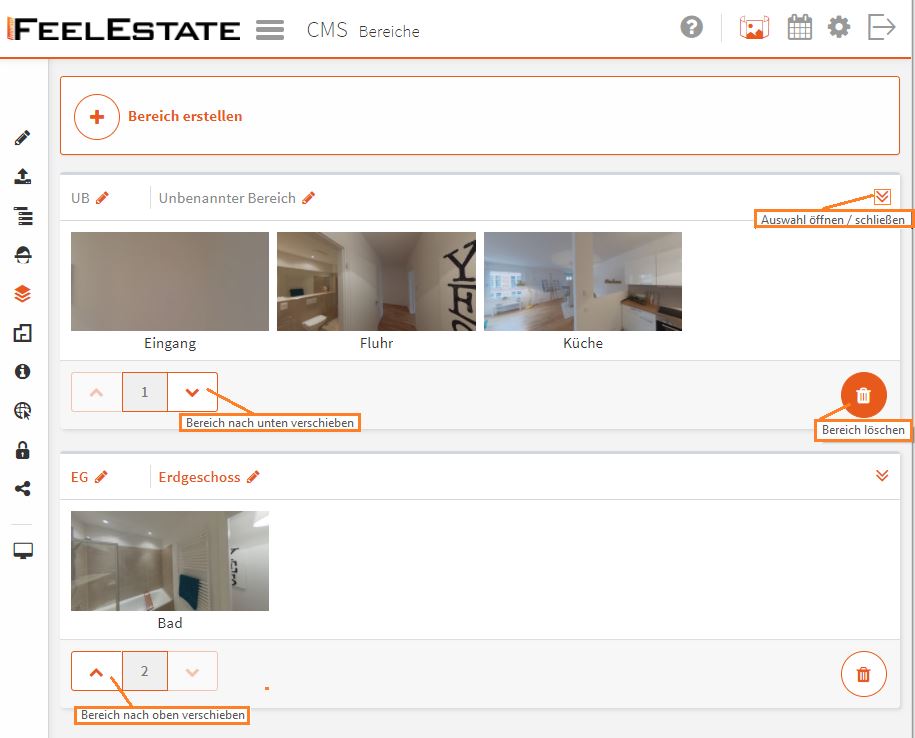
- Open / Close – Expand the view of an area to see all images assigned to it.
- Move Area Up/Down – Change the position of an area in the 360-degree-tour by moving in up or down using the arrow buttons.
Move to the next article Step 7: Integrating Floor Plans